


UART Serial Communication Experiment Based on Raspberry Pi 4B and STM32

Global electronic component supplier AMPHEO PTY LTD: Rich inventory for one-stop shopping. Inquire easily, and receive fast, customized solutions and quotes.
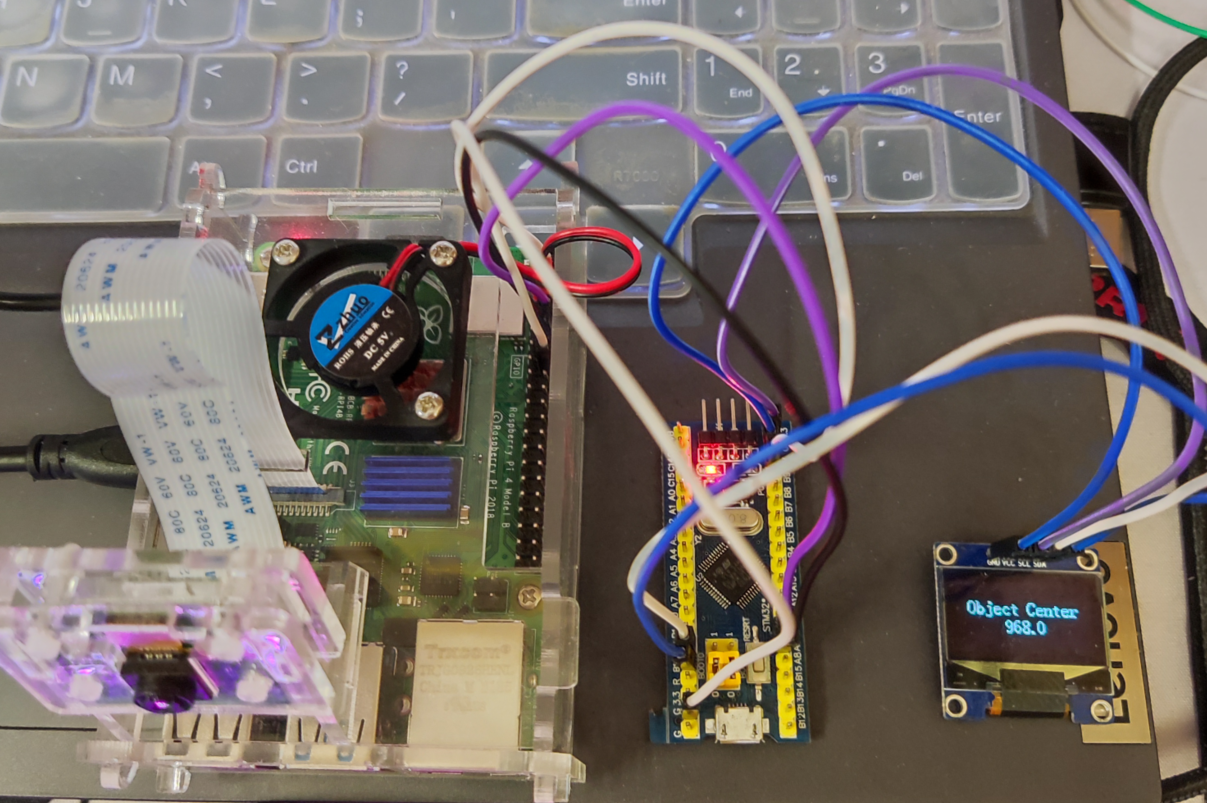
This experiment demonstrates how to establish UART (Universal Asynchronous Receiver/Transmitter) serial communication between a Raspberry Pi 4B and an STM32 microcontroller.
Hardware Requirements
-
Raspberry Pi 4B
-
STM32 development board (e.g., STM32F103C8T6, STM32F407, etc.)
-
USB to TTL serial converter (if needed)
-
Jumper wires
-
Breadboard (optional)
Connection Diagram
Raspberry Pi 4B          STM32
---------------------------------
GPIO 14 (TXD)  ------>  USART_RX (e.g., PA3)
GPIO 15 (RXD)  <------  USART_TX (e.g., PA2)
GND           ------>  GND
Note: Ensure both devices share a common ground.
Raspberry Pi Setup
1. Enable UART on Raspberry Pi
Edit the config file:
sudo nano /boot/config.txt
Add or modify these lines:
enable_uart=1
dtoverlay=disable-bt
Reboot the Pi:
sudo reboot
2. Install necessary tools
sudo apt-get install python3-serial
3. Python Code for Raspberry Pi
import serial
import time

# Configure serial port
ser = serial.Serial(
    port='/dev/serial0',  # Default UART port
    baudrate=115200,
    parity=serial.PARITY_NONE,
    stopbits=serial.STOPBITS_ONE,
    bytesize=serial.EIGHTBITS,
    timeout=1
)

try:
    while True:
        # Send data to STM32
        message = "Hello STM32 from Raspberry Pi!\n"
        ser.write(message.encode())
        print(f"Sent: {message.strip()}")

        # Receive data from STM32
        if ser.in_waiting > 0:
            received_data = ser.readline().decode('utf-8').strip()
            print(f"Received: {received_data}")

        time.sleep(1)

except KeyboardInterrupt:
    print("Communication stopped")
    ser.close()
STM32 Setup (Using HAL Library)
1. CubeMX Configuration
-
Enable USART peripheral in asynchronous mode
-
Configure baud rate (must match Raspberry Pi, e.g., 115200)
-
Enable USART global interrupt (optional for interrupt-based reception)
2. STM32 Code Example
#include "stm32f1xx_hal.h"

UART_HandleTypeDef huart1;

void SystemClock_Config(void);
static void MX_GPIO_Init(void);
static void MX_USART1_UART_Init(void);

int main(void) {
    HAL_Init();
    SystemClock_Config();
    MX_GPIO_Init();
    MX_USART1_UART_Init();

    char rxBuffer[100];
    char txBuffer[100];

    while (1) {
        // Receive data from Raspberry Pi
        HAL_UART_Receive(&huart1, (uint8_t*)rxBuffer, sizeof(rxBuffer), HAL_MAX_DELAY);

        // Process received data (example: echo back)
        sprintf(txBuffer, "Echo: %s", rxBuffer);

        // Send response back to Raspberry Pi
        HAL_UART_Transmit(&huart1, (uint8_t*)txBuffer, strlen(txBuffer), HAL_MAX_DELAY);

        // Clear buffers
        memset(rxBuffer, 0, sizeof(rxBuffer));
        memset(txBuffer, 0, sizeof(txBuffer));

        HAL_Delay(1000);
    }
}

// USART1 Initialization Function
static void MX_USART1_UART_Init(void) {
    huart1.Instance = USART1;
    huart1.Init.BaudRate = 115200;
    huart1.Init.WordLength = UART_WORDLENGTH_8B;
    huart1.Init.StopBits = UART_STOPBITS_1;
    huart1.Init.Parity = UART_PARITY_NONE;
    huart1.Init.Mode = UART_MODE_TX_RX;
    huart1.Init.HwFlowCtl = UART_HWCONTROL_NONE;
    huart1.Init.OverSampling = UART_OVERSAMPLING_16;
    if (HAL_UART_Init(&huart1) != HAL_OK) {
        Error_Handler();
    }
}

// Error handler and other necessary functions would go here
Testing the Communication
-
Upload the code to your STM32 board
-
Run the Python script on Raspberry Pi:
python3 uart_communication.py
-
You should see messages being exchanged between the devices
Troubleshooting
-
No communication:
-
Check wiring connections
-
Verify baud rates match on both devices
-
Ensure common ground connection
-
-
Garbled data:
-
Check baud rate settings
-
Verify voltage levels (RPi is 3.3V, STM32 may be 3.3V or 5V - use level shifter if needed)
-
-
Permission denied errors on Raspberry Pi:
sudo usermod -a -G dialout pi
sudo chmod a+rw /dev/serial0
Advanced Options
-
Implement interrupt-based reception on STM32 for better performance
-
Add protocol framing (e.g., start/end markers, checksums) for reliable communication
-
Use DMA for high-speed data transfer
-
Implement flow control if needed (RTS/CTS)
This basic UART communication setup can serve as the foundation for more complex embedded systems projects combining Raspberry Pi and STM32 capabilities.
Related Articles
- ·How do you set up a Raspberry Pi as a VPN server?
- ·STM32 four precision control methods for stepper motors
- ·What is the lowest power STM32 MCU? how to choose?
- ·Blue Pill vs Black Pill: What’s the Difference and How to Choose?
- ·Why can STM32 stand out from many 32-bit microcontrollers?
- ·Why can Arm chips change today's world?
- ·How to distinguish fake chips?
- ·How do I secure an MCU from hacking or tampering?
- ·What are the advantages and disadvantages of using SoCs in embedded systems?
- ·How to convert Raspberry Pi to desktop PC?