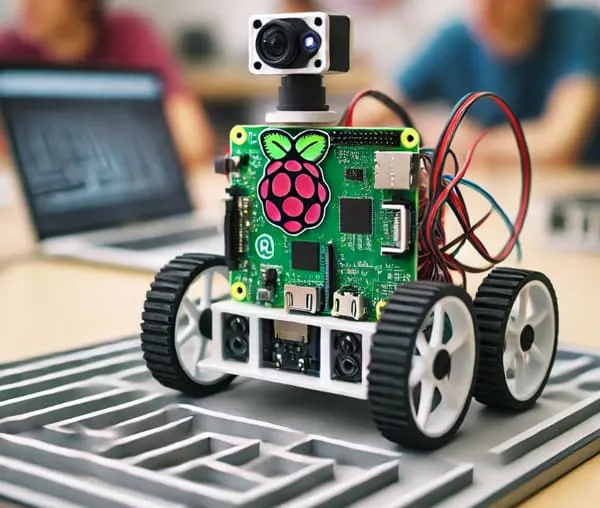
How to build a Raspberry Pi robot?
Global electronic component supplier AMPHEO PTY LTD: Rich inventory for one-stop shopping. Inquire easily, and receive fast, customized solutions and quotes.
Building a Raspberry Pi robot is a fun and educational project! Here’s a step-by-step guide to help you create a basic robot using a Raspberry Pi.

1. Gather the Components
You’ll need the following parts:
-
Raspberry Pi (any model, but RPi 4 or RPi 5 is recommended for better performance)
-
MicroSD card (16GB or larger, with Raspberry Pi OS installed)
-
Motor driver board (L298N or L293D)
-
DC motors (2 or 4, depending on your chassis)
-
Robot chassis kit (with wheels)
-
Battery pack (for motors, e.g., 6V or 12V)
-
Power bank or battery (for Raspberry Pi, 5V)
-
Jumper wires (male-to-female and male-to-male)
-
Optional: Ultrasonic sensor (HC-SR04) for obstacle avoidance, camera module, or other sensors.
2. Assemble the Robot Chassis
-
Follow the instructions in your chassis kit to mount the motors and wheels.
-
Attach a caster wheel (or ball bearing) for balance if needed.
3. Connect the Motors to the Motor Driver
-
Connect the two (or four) DC motors to the motor driver (L298N).
-
Connect the motor driver to the Raspberry Pi GPIO pins:
-
IN1, IN2 → Control Motor A (e.g., GPIO 17, 18)
-
IN3, IN4 → Control Motor B (e.g., GPIO 22, 23)
-
GND → Raspberry Pi ground
-
+5V → Optional power for logic (can be from Pi or battery)
-
Motor power input → Connect to a separate battery (6V-12V).
-
4. Power the Raspberry Pi and Motors
-
Use a power bank (5V) for the Raspberry Pi.
-
Use a separate battery pack (6V-12V) for the motors to avoid power issues.
5. Set Up Raspberry Pi OS
-
Flash Raspberry Pi OS Lite (or Desktop) to the MicroSD card using Raspberry Pi Imager.
-
Enable SSH (for remote access) and configure Wi-Fi if needed.
-
Boot the Pi and update:
sudo apt update && sudo apt upgrade -y
6. Install Required Libraries
Install Python libraries for GPIO control:
sudo apt install python3-pip python3-gpiozero
pip3 install RPi.GPIO
7. Write the Robot Control Code
Create a Python script (robot_control.py) to control the motors:
import RPi.GPIO as GPIO
import time

# Motor pins
IN1 = 17  # GPIO17
IN2 = 18  # GPIO18
IN3 = 22  # GPIO22
IN4 = 23  # GPIO23

# Setup GPIO
GPIO.setmode(GPIO.BCM)
GPIO.setup(IN1, GPIO.OUT)
GPIO.setup(IN2, GPIO.OUT)
GPIO.setup(IN3, GPIO.OUT)
GPIO.setup(IN4, GPIO.OUT)

def stop():
    GPIO.output(IN1, False)
    GPIO.output(IN2, False)
    GPIO.output(IN3, False)
    GPIO.output(IN4, False)

def forward():
    GPIO.output(IN1, True)
    GPIO.output(IN2, False)
    GPIO.output(IN3, True)
    GPIO.output(IN4, False)

def backward():
    GPIO.output(IN1, False)
    GPIO.output(IN2, True)
    GPIO.output(IN3, False)
    GPIO.output(IN4, True)

def left():
    GPIO.output(IN1, False)
    GPIO.output(IN2, True)
    GPIO.output(IN3, True)
    GPIO.output(IN4, False)

def right():
    GPIO.output(IN1, True)
    GPIO.output(IN2, False)
    GPIO.output(IN3, False)
    GPIO.output(IN4, True)

try:
    while True:
        cmd = input("Enter command (f/b/l/r/s): ").lower()
        if cmd == 'f':
            forward()
        elif cmd == 'b':
            backward()
        elif cmd == 'l':
            left()
        elif cmd == 'r':
            right()
        elif cmd == 's':
            stop()
        else:
            print("Invalid command!")
except KeyboardInterrupt:
    GPIO.cleanup()
Run the script:
python3 robot_control.py
(Use f=forward, b=backward, l=left, r=right, s=stop.)
8. Add Sensors (Optional)
Ultrasonic Sensor (HC-SR04) for Obstacle Avoidance
-
Connect:
-
Trig → GPIO 5
-
Echo → GPIO 6
-
VCC → 5V
-
GND → GND
-
Modify the code to include obstacle detection:
from gpiozero import DistanceSensor
sensor = DistanceSensor(echo=6, trigger=5)

while True:
    distance = sensor.distance * 100  # in cm
    print(f"Distance: {distance:.1f} cm")
    if distance < 20:  # Stop if obstacle is too close
        stop()
    else:
        forward()
    time.sleep(0.1)
9. Remote Control (Optional)
-
Use SSH for terminal control.
-
Or set up a web server (Flask) for browser control.
-
Or use Bluetooth/WiFi for smartphone control.
10. Test and Improve
-
Test movement and adjust motor speeds if needed (use PWM for speed control).
-
Add more sensors (line-following, camera for OpenCV, etc.).
-
Design a 3D-printed body for a custom look!
Final Notes
-
Ensure proper wiring to avoid short circuits.
-
Use a voltage regulator if needed for stable power.
-
Secure all components with zip ties or double-sided tape.
Related Articles
- ·What are some common Arduino projects for beginners?
- ·How do you set up a Raspberry Pi as a VPN server?
- ·Why can Arm chips change today's world?
- ·What are the advantages and disadvantages of using SoCs in embedded systems?
- ·How to convert Raspberry Pi to desktop PC?
- ·SoC vs SoM: What's the Difference?
- ·DS18B20 Temperature Sensor Detailed Explanation and Use Cases
- ·How to build an AI agent using Raspberry Pi?
- ·UART Serial Communication Experiment Based on Raspberry Pi 4B and STM32
