


Which platform is better for home automation, Raspberry Pi or Arduino?
January 11 2024 
Inquiry
Global electronic component supplier AMPHEO PTY LTD: Rich inventory for one-stop shopping. Inquire easily, and receive fast, customized solutions and quotes.
QUICK RFQ
ADD TO RFQ LIST
The quest for a smarter home is in full swing, and two powerful contenders stand at the forefront: the Raspberry Pi and the Arduino. In this blog, we dissect their capabilities, helping you choose the champion for your smart haven.
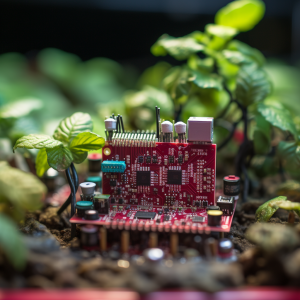
What’s Raspberry Pi?
Features of Raspberry Pi
- Powerful CPU and RAM: able to handle multimedia, data analysis, and sophisticated automation logic.
- Multiple Operating Systems: A variety of operating systems are available to meet different demands, including Windows 10 IoT Core, Ubuntu, and Raspbian.
- Wide-ranging Connectivity: Establish connections with Bluetooth, Ethernet, USB, and Wi-Fi devices to enable flexible communication.
- GPIO Pins: Use physical pins to directly control motors, LED lights, and other actuators.
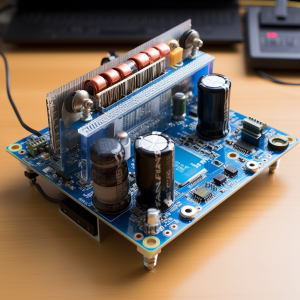
What is Arduino?
Who invented Arduino?
Arduino was created in 2005 by Italian designers Massimo Banzi and Gianluca Martino as an approachable platform for designers and artists to work with electronics. It continues to be a pillar of the maker community today, giving creators more simplicity of use.Features of Arduino
- Easy to Use: Even beginners can use it thanks to the hardware's simplicity and beginner-friendly programming language.
- Affordable: Its comparatively low expense makes it perfect for automation project experimentation and prototyping.
- Compact and Portable: Ideal for little tasks, and adaptable to a variety of configurations.
- Built-in Analog and Digital Inputs and Outputs: Read data straight from sensors and control devices with built-in analog and digital inputs and outputs.
Can Arduino Store Data?
Arduino can store limited data on its internal flash memory, but it's not designed for data-intensive applications. For complex data analysis and storage, the Raspberry Pi's larger memory and access to external storage options like USB drives or cloud storage are essential.Video related to Arduino vs Raspberry Pi
How Raspberry Pi Works?
- Setup: You must first configure your Raspberry Pi. This entails placing an operating system-containing microSD card—like Raspbian—into the Raspberry Pi board's card port. To boot up the Raspberry Pi, you also need to connect a power source, a USB keyboard and mouse, and an HDMI monitor or TV.
- Booting Up: Upon turning on the Raspberry Pi, the microSD card's operating system is read into memory and the device begins to operate. On the TV or monitor that is connected, you will see the boot sequence.
- Desktop Environment: The operating system's desktop environment will be shown to you after the boot procedure is finished. From here, you can use the keyboard and mouse to interact with the Raspberry Pi just like you would with a standard computer.
- Software and Programming: The Raspberry Pi may be used to install and run a variety of software programs and programming languages. As a result, you may create projects, write code, and use programs that are customized to your preferences and requirements.
- GPIO Interfacing: The Raspberry Pi can communicate with and control external hardware using its GPIO (General Purpose Input/Output) pins. This implies that you can configure the Raspberry Pi to interact with the real environment by connecting sensors, LEDs, motors, and other electronic components to it.
- Projects and Applications: The Raspberry Pi can be used for a variety of projects and applications after it is configured and operating. This could include making a retro game console, constructing a media center, putting up a home automation system, doing robotics experiments, or studying electronics and programming.
How Arduino Works?
- Selecting an Arduino Board: Choosing the right Arduino board for your project is the first step. There are several models available, and each has unique features and functionalities. The Arduino Uno is the most popular board and a wonderful place for newcomers to start.
- Writing Code: You write code in a language akin to C/C++ using the Arduino Integrated Development Environment (IDE), which is used to create sketches. The Arduino board's interface with the attached hardware is specified in these designs. To read sensor data, operate motors, or connect with other devices, for instance, you can write code.
- Connecting Hardware: The Arduino board's input/output pins are used to connect a variety of electronic components, including motors, displays, LEDs, and sensors. These parts can be utilized for information display, interaction with the real world, and environmental sensing.
- Uploading Code: After writing the code, use a USB connection to upload it to the Arduino board. The code is translated into machine language by the Arduino IDE and uploaded to the microcontroller of the board, where it is saved in memory.
- Execution: Upon uploading the code, the Arduino board carries out the commands specified within the code. The board will perform certain tasks, like as reading data from a sensor and then turning on a motor in response to that data, if that is how the code is written.
- Iterative Development: The development process can be iterated with Arduino. You can upload the revised code to the board to see the changes in operation, or you can alter the code, add new parts, or alter the way the system behaves.
- Projects and Applications: The Arduino board can be utilized for a variety of projects and uses, including making robots, developing interactive art installations, prototyping electronic gadgets, and much more, once the code has been uploaded and the hardware established.
Where Raspberry Pi is Used?
- Complex Automation: Construct advanced systems with motion sensors, cameras, and automatic warnings, such as smart security.
- Data Analysis and Insights: Use sensor data analysis to identify patterns, improve energy use, and customize automation.
- Multimedia Hub: Construct a vintage game system or stream movies, TV series, and music.
- Remote Control and Monitoring: Use SSH or VNC to access your home automation system from any location in the world.
Where Arduino is Used?
- Simple Automation Tasks: Track temperature, use motion to regulate lighting or program irrigation systems.
- Prototyping and Learning: Take up electrical experiments, pick up some coding skills, and construct simple automation solutions.
- Robotics and Interactive Projects: Building robots, making art displays, or operating musical instruments are examples of robotics and interactive projects.
- Reliable and Efficient: Perfect for tasks demanding little power usage and quick response times.
Arduino vs Raspberry Pi
| Feature | Raspberry Pi | Arduino |
| Complexity | Handles complex logic, data analysis, and multiple tasks | Ideal for simple automation tasks and real-time interaction with hardware |
| Power and Performance | Powerful CPU and RAM for demanding applications | Lower processing power, efficient for basic tasks |
| Software and Customization | Extensive software options and customization potential | Limited software options, but beginner-friendly programming language |
| Connectivity and Versatility | Wi-Fi, Ethernet, Bluetooth, and USB ports for various connections | Limited connectivity options, but dedicated GPIO pins for direct device control |
| Cost | More expensive than Arduino, varies depending on the model | Affordable and cost-effective for smaller projects |
Conclusion
In conclusion, the "better" platform will rely on your unique requirements and objectives. Raspberry Pi is your hero if you're a tech fanatic with grand aspirations for an intricate smart house. Arduino is a great partner if you're a newbie on a tight budget or looking for easy, effective automation solutions.Related Articles
- ·Stratix 10 VS Stratix V: Which FPGA is Right for Your Next Project?
- ·Intel Xeon Platinum 8454H vs AMD EPYC: Which Reigns Supreme?
- ·A Deep Dive into the AMD EPYC 4564P Processor
- ·MSP430F5438A vs MSP430F5529: A Detailed Analysis of Their Capabilities
- ·Comparing MSP430F6659 and MSP430F5419A: Which One is Right for Your Project?
- ·Exploring the Features of MSP430F5529 and MSP430F5638 Microcontrollers
- ·Demystifying 20 Microcontroller Projects for Beginners
- ·Unveiling the Ultimate Guide to Microcontroller Programming
- ·4680 Battery: Unveiling the Power Potential of the Next-Gen Cell
- ·Exploring the Case Studies on Arduino Applications
Populer Posts
A2F500M3G-PQ208I
Microchip Technology
AGFB006R24C2I3E
Intel
1SX280HN1F43E1VGAS
Intel
1SX065HH3F35I2LG
Intel
AGFA014R24C2E4F
Intel
MPFS160TS-1FCSG536I
Microchip Technology
1SX065HH3F35I2VG
Intel
1SX065HH2F35E2LG
Intel
5ASXFB5H4F40I5G
Intel
5CSTFD6D5F31I7N
Intel