


How to Install Standoffs in Electronics: A Step-by-Step Tutorial
April 01 2024 
Inquiry
Global electronic component supplier AMPHEO PTY LTD: Rich inventory for one-stop shopping. Inquire easily, and receive fast, customized solutions and quotes.
QUICK RFQ
ADD TO RFQ LIST
In this blog, we will equip you with everything you need to know about standoffs, from their purpose to the nitty-gritty of installation.
What are Standoffs?
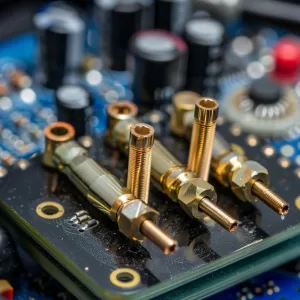
Standoffs Features
- Motherboard Mounting: Motherboard mounting is most commonly done with motherboard standoffs. They screw into predetermined holes in the computer casing and give the appropriate height for the motherboard to sit firmly, allowing proper ventilation around vital components.
- PCB (Printed Circuit Board) Support: Standoffs raise PCBs off a mounting surface, allowing for greater heat dissipation and preventing components from shorting against it.
- Component Spacing: Standoffs can be used to provide particular distances between electronic components, ensuring optimal performance and preventing electrical interference.
- Sign Installation: Standoffs are also used in signage applications to provide a gap between the sign and the mounting surface, which allows for illumination or a more visually pleasing presentation.
When was Standoffs Invented?
While the actual history of standoffs is unknown, the concept of employing spacers for mounting goes back millennia. Early iterations most likely used primitive wooden pegs or metal rods. As technology improved, so did the design and materials utilized in standoffs, resulting in the current standardized versions.What are Standoffs Used for?
Standoffs are essentially spacers that perform two functions: opening a gap between an object and a surface and securely mounting that object. Their adaptability in achieving these goals allows them to be applied in a variety of settings. Here's a closer look at how standoffs are used:- Signage: They are commonly used to attach signs, plaques, and exhibits on walls, doors, and even other signs. Standoffs elevate the sign and provide better visibility, giving it a clean, professional appearance.
- Electronics: Standoffs are essential for securing various components in the electronics industry. They are used to mount circuit boards, routers, and other devices to walls or workstations. This allows for airflow, prevents overheating, and improves cable management.
- Shelving: Have you ever seen those elegant floating shelves that appear to mysteriously hang on the wall? Standoffs are frequently the secret behind them. To obtain a sleek, minimalist design, attach shelves to wall-mounted standoffs. Standoffs can also be utilized to construct spaced shelves, which are ideal for ornamental displays or extra storage.
- Art Displays: Standoffs are widely used by art galleries and museums to display paintings, sculptures, and other important works. Standoffs raise the artwork slightly off the wall, producing a visually appealing display while protecting harm from direct touch.
- Countertops and Panels: Standoffs are commonly used to support countertop materials such as granite or quartz. These spacers establish a modest gap between the countertop and the underlying cabinets, adding beauty while also providing potential plumbing or electrical access underneath. Similarly, decorative panels on walls can be mounted with standoffs to achieve a dimensional impression.
Video related to Standoffs
How do Standoffs Work?
Components:- Body: This is the primary spacer element, with threaded ends on both sides (known as a double-threaded standoff) or a threaded body on one end and a non-threaded end (single-threaded).
- Fasteners: Screws, bolts, or other fasteners are used to attach the standoff to the wall or mounting surface via the threaded end (single-threaded) or one of the threaded ends (double-threaded).
- Attachment Point: The other end (or often both ends) includes a mechanism for attaching the object you want to lift. This could be:
- Threads: Threads are similar to fastener ends, allowing you to screw the object directly onto the standoff.
- Flat Plate: A flat surface on which an object can be placed and attached using screws, clips, or adhesives.
- Gripping Mechanism: Specialized designs for certain objects, such as signs with slotted standoffs.
- Drilling: The initial step is normally to drill holes in the mounting surface at the required locations for the standoffs.
- Securing the Standoff: Screw the standoff's threaded end(s) into the holes to firmly attach it to the wall or foundation.
- Object Attachment: Finally, the object you want to elevate (sign, shelf, etc.) is secured to the opposite end of the standoff with the proper mechanism. Depending on the standoff design, you may need to screw it to threaded studs, insert it into a slotted channel, or use another attaching method.
How to Use Standoffs?
Tools and Materials:- Phillips screwdriver (or appropriate screwdriver depending on standoff screw type)
- Motherboard
- Computer case with pre-drilled standoff mounting holes (consult your case manual for exact locations)
- Standoffs (the right size and thread type)
- Standoff screws (if not pre-threaded into the standoff)
- Locate the motherboard standoff mounting holes: Consult your computer case manual to see where the motherboard standoffs should be installed. These holes are often found around the bottom edge of the case, near the I/O panel.
- Screw in the Standoffs: Depending on your case and standoffs, you may need to screw the standoff screws into place before installation.
- Position the standoffs: Screw the standoffs carefully into their appropriate holes in the casing. Ensure that they are securely screwed in but not overtightened, as this may harm the threads or the casing.
- Place the Motherboard: Align the motherboard mounting holes with the fitted standoffs. Lower the motherboard gently onto the standoffs, ensuring that all mounting holes are perfectly aligned.
- Secure the Motherboard: Use the proper screws (see your motherboard handbook) to fasten the motherboard to the standoffs at each indicated mounting location. Tighten the screws firmly, but not too much.
How to Remove Standoffs from Case?
If you need to remove standoffs from a case, the process is quite simple:- Unscrew the Standoff Screws: Using the proper screwdriver, loosen and remove the screws that secure the standoffs to the case.
- Gently Unscrew the Standoffs: After removing the screws, carefully unscrew the Standoffs by rotating them counterclockwise.
- Store the Standoffs: It is a good idea to keep the removed standoffs in a safe place for future usage in the same or other projects.
Where to Buy Standoffs?
Standoffs are widely accessible at electronics stores, hardware stores, and online merchants. They come in a variety of sizes, materials (mostly nylon, brass, or steel), and thread types (metric or imperial). When choosing standoffs, consider the following factors:- Size: Select standoffs of a suitable length to achieve the specified spacing in your project. The length is usually measured in millimeters (mm) or inches.
- Thread Type: Check that the threads on the standoff match the threading of the mounting points (screws or other standoffs).
- Material:
- Nylon standoffs are lightweight, inexpensive, and have outstanding insulation qualities, however, they may not be appropriate for heavy-duty applications.
- Brass standoffs offer an excellent blend of strength, cost, and corrosion resistance.
- Steel standoffs provide the most strength and endurance, but they are more expensive and may conduct electricity.
Conclusion
Standoffs, despite their tiny size, serve an important role in guaranteeing the proper operation and lifetime of your electronics. Understanding their purpose, selecting the appropriate type, and properly installing them will provide your projects with the crucial support and spacing they require to grow.Related Articles
- ·Stratix 10 VS Stratix V: Which FPGA is Right for Your Next Project?
- ·Intel Xeon Platinum 8454H vs AMD EPYC: Which Reigns Supreme?
- ·A Deep Dive into the AMD EPYC 4564P Processor
- ·MSP430F5438A vs MSP430F5529: A Detailed Analysis of Their Capabilities
- ·Comparing MSP430F6659 and MSP430F5419A: Which One is Right for Your Project?
- ·Exploring the Features of MSP430F5529 and MSP430F5638 Microcontrollers
- ·Demystifying 20 Microcontroller Projects for Beginners
- ·Unveiling the Ultimate Guide to Microcontroller Programming
- ·4680 Battery: Unveiling the Power Potential of the Next-Gen Cell
- ·Exploring the Case Studies on Arduino Applications
Populer Posts