


Comparison of Orange Pi and Raspberry Pi
February 02 2024 
Inquiry
Global electronic component supplier AMPHEO PTY LTD: Rich inventory for one-stop shopping. Inquire easily, and receive fast, customized solutions and quotes.
QUICK RFQ
ADD TO RFQ LIST
In this blog, we will unveil the meaning, and working principles of Orange Pi and Raspberry Pi, comparing their pros and cons, guiding you towards your perfect match.
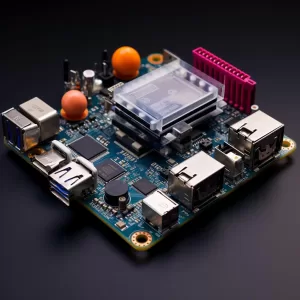
What is Orange Pi?
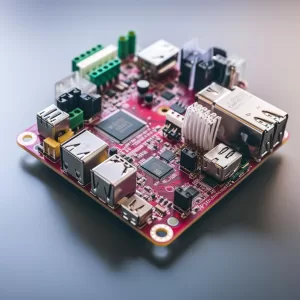
What’s Raspberry Pi?
How Orange Pi Works?
- Power supply: Use a micro USB cable to connect the Orange Pi to a power source.
- Bootable media: Insert a microSD card that has been flashed with the selected operating system.
- Boot sequence: The OS is loaded from the SD card when the Orange Pi boots up.
- User interface: A desktop environment or a command-line interface may greet you, depending on the operating system.
- Interaction: To interact with the operating system and programs, use peripherals like a keyboard, mouse, or touchscreen.
- Customization: Installing and configuring different tools and programs to fit your unique requirements and projects is possible.
How to Programming Orange Pi?
Orange Pi welcomes a wide range of programming languages and operating systems in its open-source spirit. Popular options include well-known Linux distributions for programmers, such as Ubuntu and Armbian. To unleash the full power of your Orange Pi, you can code in Python, C++, Java, and, for the more timid among you, Scratch. Although the learning curve is a little steeper than it is for the Raspberry Pi, there is plenty of support available from the large software library and online groups.How to Set Up Orange Pi 5?
- Download the OS Image:
- Go to the download page for Orange Pi OS.
- Select the picture file that corresponds to your Orange Pi 5 model.
- Save it to your local drive after downloading it.
- Prepare the Micro SD Card:
- Slide the micro SD card into a card reader that is linked to your PC.
- Apply the FAT32 file system on the micro SD card.
- Write the Image to the SD Card:
- Utilize a program such as Win32DiskImager or Balena Etcher to write the Downloaded image file to the micro SD card.
- Make sure the card has the image written on it accurately.
- Connect Peripherals:
- Put the Orange Pi 5's micro SD card inside.
- Use HDMI to connect the Orange Pi 5 to a display.
- Insert a USB keyboard.
- Initial Boot:
- Turn on the Orange Pi 5.
- It can take a few minutes for the Pi to expand the filesystem during the initial boot. Try not to unplug throughout this process and have patience.
- Use the default login information to log in (typically root and orange pi).
- Flash OS to M.2 SSD (Optional):
- If you have an M.2 SSD, you can achieve super-fast performance by flashing the OS onto it:
- Partitions on the M.2 SSD can be cleaned up with programs like disk.
- To copy the Ubuntu image from the micro SD card to the M.2 SSD, use PowerShell or another technique.
- To instruct the SPI flash to boot from the M.2 SSD, write a boot script.
- Enjoy the speed increase after restarting the Orange Pi 5!
- If you have an M.2 SSD, you can achieve super-fast performance by flashing the OS onto it:
How Raspberry Pi Works?
Running an operating system similar to Linux, Raspberry Pi offers an interface for interacting with its hardware, which includes sensors, LEDs, and cameras. You can use SSH to control it remotely or connect it to a monitor, keyboard, and mouse. You can instruct your Pi what to do by programming it in Python, Scratch, or other languages, opening up a world of possibilities.How to Connect Raspberry Pi to Cloud?
- Google Drive, Dropbox, and Other Cloud Services:
- You can take advantage of well-known cloud storage services such as Microsoft Azure, Apple iCloud, Amazon S3, Dropbox, and Google Drive.
- Select the service that best meets your needs as each has advantages and disadvantages.
- Sync files on your Raspberry Pi with the cloud service of your choice.
- Nextcloud:
- You may set up Nextcloud, a self-hosted cloud storage option, on your Raspberry Pi.
- It offers functions like calendars, contacts, photographs, file storage, and more.
- You can use Docker or install Nextcloud natively on your Raspberry Pi by following the instructions.
- AWS IoT Core:
- Consider linking your Raspberry Pi to AWS IoT Core if you enjoy developing Internet of Things apps.
- AWS offers all-inclusive device administration, data processing, and secure communication tools for IoT devices.
- Particle Cloud:
- Check out our guide on connecting your Raspberry Pi to Particle Cloud if you're developing Internet of Things projects.
- For linked devices, Particle Cloud provides data storage, device management, and real-time communication.
- Custom Solutions:
- You can use technologies like Node.js, MQTT, or WebSocket to develop your cloud architecture if you have special requirements.
- Create a cloud server (such as AWS EC2, DigitalOcean, or your server) and connect it to your Raspberry Pi.
How to Connect to Raspberry Pi over Ethernet?
Connect to a network that is wired for dependable and secure communication. Just use an Ethernet wire to connect your Pi to a router or switch, then use your OS to set the network settings. For applications like streaming movies, remote access, and data transfer, a wired connection is the best option because it provides far quicker speeds and lower latency than Wi-Fi. very applications that need very high bandwidth or real-time responsiveness, this is extremely crucial.How to Update Raspberry Pi?
Update your Pi officially to keep it operating smoothly! To flash the most recent software and firmware images onto your SD card, use the Raspberry Pi Imager. As an alternative, a lot of OS distributions have specific updating tools in their user interface. You can be sure you have the newest features, security patches, and bug fixes by routinely updating your Pi.How to Reset Raspberry Pi?
- Soft reset: To perform a soft reset, use the "sudo reboot" command via the OS interface or the command line.
- Hard reset: Press and hold the power button until the Raspberry Pi turns off, then turn it back on.
Video related to Orange Pi vs Raspberry Pi
Orange Pi vs Raspberry Pi
Similarities:- Both provide scalable storage and connectivity choices along with single-board computer functionality.
- Both allow for programming and application development by running operating systems such as Linux.
- Both enable a large selection of peripherals and sensors for various applications.
- Orange Pi is perfect for demanding activities like AI and media streaming because it typically has faster CPUs and more RAM.
- Raspberry Pi is an affordable, high-performance device that may be used for learning, simple projects, and vintage video games.
- Orange Pi serves specific applications by supporting a larger variety of Linux distributions and even Windows 10 IoT Core.
- Raspberry Pi is primarily focused on Linux distributions, offering a large selection of options that are suitable for beginners, such as Ubuntu and Raspbian.
- Orange Pi frequently has more robust connectivity options, such as specialized MIPI interfaces for camera modules, several USB ports, and gigabit Ethernet.
- Suitable for the majority of simple projects and educational objectives, Raspberry Pi provides typical connectivity choices such as Ethernet, Bluetooth, and Wi-Fi.
- Because of its greater performance characteristics, Orange Pi is typically more expensive than Raspberry Pi.
- The Raspberry Pi is still the most affordable choice, making it a convenient way to get started with small-scale technology.
- The Orange Pi community is expanding, although it's not as big as Raspberry Pi's. There may be certain restrictions on the online materials and tutorials for particular models.
- With a vast and active community, Raspberry Pi offers an abundance of online resources, tutorials, and project ideas suitable for all skill levels.
Where is Orange Pi Used?
- IoT (Internet of Things) Projects: Orange Pi is used by makers and developers to create sensor networks, home automation systems, and IoT gadgets.
- Media Centers and Entertainment: To build your home theater system, install Plex, Kodi, or other media center software on an Orange Pi.
- Server Applications: Run file servers, game servers, lightweight web servers, or even Minecraft servers as server applications.
- Custom Projects and Prototyping: Orange Pi is used by enthusiasts to create bespoke gadgets, DIY devices, and weather stations, among other things.
Where Raspberry Pi is Used?
- Education: Using interesting projects, teach robotics, electronics, and coding.
- Home automation: Managing appliances such as thermostats and lighting.
- Media Center: Streaming movies, and music, and playing classic retro games.
- Web Server: Providing web space for apps and websites.
- Prototyping: Developing and testing electronic circuits and software.
Conclusion
The decision between Orange Pi and Raspberry Pi ultimately comes down to your requirements and tastes. Orange Pi may be your best bet if you value speed and variety in connectivity above everything else. But Raspberry Pi is still the clear winner when it comes to price, ease of use for beginners, and a large community. All things considered, these platforms present fascinating opportunities for learning, experimenting, and producing. What is Orange PiWhat’s Raspberry PiHow Orange Pi WorksHow to Programming Orange PiHow to Set Up Orange Pi 5How Raspberry Pi WorksHow to Connect Raspberry Pi to CloudHow to Connect to Raspberry Pi over EthernetHow to Update Raspberry PiHow to Reset Raspberry PiVideo related to Orange Pi vs Raspberry PiOrange Pi vs Raspberry PiWhere is Orange Pi UsedWhere Raspberry Pi is UsedConclusion
Related Articles
- ·Stratix 10 VS Stratix V: Which FPGA is Right for Your Next Project?
- ·Intel Xeon Platinum 8454H vs AMD EPYC: Which Reigns Supreme?
- ·A Deep Dive into the AMD EPYC 4564P Processor
- ·MSP430F5438A vs MSP430F5529: A Detailed Analysis of Their Capabilities
- ·Comparing MSP430F6659 and MSP430F5419A: Which One is Right for Your Project?
- ·Exploring the Features of MSP430F5529 and MSP430F5638 Microcontrollers
- ·Demystifying 20 Microcontroller Projects for Beginners
- ·Unveiling the Ultimate Guide to Microcontroller Programming
- ·4680 Battery: Unveiling the Power Potential of the Next-Gen Cell
- ·Exploring the Case Studies on Arduino Applications
Populer Posts
TMS320C6747BZKB3
Texas Instruments
TMS320DM6467CZUTV
Texas Instruments
TMS320DM643AGNZ6
Texas Instruments
ADSP-BF707KBCZ-4
Analog Devices Inc.
TMS320C5504AZCH10
Texas Instruments
ADSP-21567BBCZ8
Analog Devices Inc.
TMS32C6205DGWTA200
Texas Instruments
TMS320C54CSTZWS
Texas Instruments
MSC7112VM1000
NXP Semiconductors
TMS320C6412AZDK5
Texas Instruments
TMS320C25FNA
Texas Instruments
TMS320DM368ZCED48F
Texas Instruments