


A Step-by-Step Guide on Fuseholder Installation
January 18 2024 
Inquiry
Global electronic component supplier AMPHEO PTY LTD: Rich inventory for one-stop shopping. Inquire easily, and receive fast, customized solutions and quotes.
QUICK RFQ
ADD TO RFQ LIST
In this blog, we will delve into the world of fuseholders, covering everything from their functionality to installation procedures.
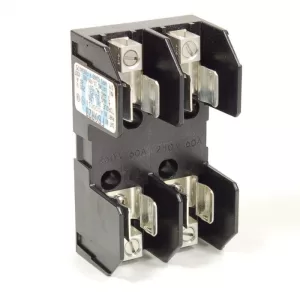
What is a Fuseholder?
What Does a Fuseholder Do?
A Fuseholder's main purpose is to guard against overcurrent damage to electrical circuits and equipment. The fuseholder cuts off the power supply when the circuit's current exceeds the fuse's rated capacity, averting potential dangers like fire or harm to delicate parts.Video related to Fuseholder
How Does a Fuseholder Work?
A fuseholder's primary function is to protect the circuit from overcurrent conditions that could potentially damage equipment or cause safety hazards. Here's how a fuseholder works:- Holding the Fuse Securely: The fuseholder's purpose is to hold the fuse firmly in place so that there is adequate electrical contact. This stops vibration or other mechanical forces from pulling the fuse out.
- Electrical Connections: The incoming and outgoing wires of the circuit are connected to terminals or connectors provided by the fuseholder. The electrical path between these terminals is completed when the fuse is placed inside the fuseholder.
- Overcurrent Protection: A fuse is intended to melt or burst in the case of an overcurrent condition, such as a short circuit or an excessive load, stopping the flow of electricity and shielding the circuit and any attached devices from harm.
- Simple Replacement: The fuseholder makes it simple to replace a fuse when one blows as a result of an overcurrent incident. This guarantees that, after the fault is fixed, the circuit can be rapidly put back into service.
How to Install a Fuseholder?
Before You Begin:- Safety First: Have some regard for electricity. Prior to doing any work, make sure the power is off and use a voltage tester to confirm.
- Assemble your equipment: If you're utilizing non-screw terminals, you'll also need crimpers, wire strippers, screwdrivers (the size of which depends on your fuseholder), and the proper personal protective equipment (PPE), such as safety glasses and gloves.
- Select the appropriate fuseholder: Choose a fuseholder that is compatible with the amperage rating and fuse type (blade, ANL, ceramic, etc.). Make sure the wire gauge corresponds to the one you are using.
- Learn how to read the wiring diagram: Accurate installation requires knowledge of the circuit layout and fuse locations.
- Trim the ends of the wires: With your wire strippers, take out about 1/2 inch of insulation from the ends of the wires that go into the fuseholder. Verify that the copper strands that are visible are neat and straight.
- Tin the ends of the wires (optional): Lightly solder the exposed copper strands to create a more stable connection, particularly with thicker wires.
- Locate the terminals: Positive(+) and negative(-) terminals are usually prominently displayed on fuseholders. Check the schematic as some may have numbered terminals.
- Complement the colors of the wire: Red or white wires are usually connected to the positive terminal, and black wires are typically connected to the negative. Verify again the wiring schematic that corresponds to your particular model.
- Tighten the connections: The type of fuseholder you have may have crimp or screw terminals. Stripped wire should be inserted beneath the screw head of screw terminals and tightly tightened. Put the copper strands within the connector barrel of crimp connectors by using your crimping tool to fasten them. Make certain that every connection is secure and that there are no loose threads.
- Pick the appropriate fuse: Select a fuse for your circuit rated at the correct amperage. The appropriate fuse size can be found in the appliance specifications or circuit diagram.
- Place the fuse in: Carefully insert the fuse into the fuseholder's corresponding slot. It ought to insert easily and without using too much force.
- Put the fuse cover in place: The snap-on cover on the majority of fuseholders shields the fuse and keeps accidental contact from happening. Ensure that it clicks firmly into position.
- Switch the electricity on: Reinstall the appliance's plug in the outlet or flip the circuit breaker back on.
- Verify the circuit: Check to see if the circuit or appliance are operating properly.
- Reroute cables, if desired: To avoid future damage or entanglement, if your installation required rerouting wires, properly secure them with cable ties or clamps.
Can a Fuseholder Go Bad?
A fuseholder can go bad over time due to various factors. Here are some reasons why a fuseholder might go bad:- Corrosion: The metal contacts within the fuseholder may corrode if it is exposed to moisture or other corrosive situations. This could result in poor electrical connections and even failure.
- Overheating: A fuseholder may overheat in high-current applications or as a result of faulty connections, damaging internal parts and impairing the fuseholder's capacity to retain the fuse firmly.
- Mechanical Wear: The contacts inside the fuseholder may become worn out with frequent insertion and removal of fuses, potentially resulting in loose connections and the failure of the fuse to maintain its place.
- Vibration and Shock: Excessive vibration or mechanical shock can cause internal fuseholder components to break free or sustain damage, which will reduce the fuseholder's dependability.
- Age and Material Degradation: The fuseholder's mechanical strength and electrical conductivity may decrease with time due to material deterioration.
Conclusion
In conclusion, fuseholders are essential for protecting electrical systems from overcurrent scenarios. Maintaining electrical safety and dependability requires an understanding of their performance and correct installation techniques. You may make sure that fuseholders are used effectively in your electrical projects and contribute to a safe and effective electrical environment by following the step-by-step instructions in this blog.Related Articles
- ·Stratix 10 VS Stratix V: Which FPGA is Right for Your Next Project?
- ·Intel Xeon Platinum 8454H vs AMD EPYC: Which Reigns Supreme?
- ·A Deep Dive into the AMD EPYC 4564P Processor
- ·MSP430F5438A vs MSP430F5529: A Detailed Analysis of Their Capabilities
- ·Comparing MSP430F6659 and MSP430F5419A: Which One is Right for Your Project?
- ·Exploring the Features of MSP430F5529 and MSP430F5638 Microcontrollers
- ·Demystifying 20 Microcontroller Projects for Beginners
- ·Unveiling the Ultimate Guide to Microcontroller Programming
- ·4680 Battery: Unveiling the Power Potential of the Next-Gen Cell
- ·Exploring the Case Studies on Arduino Applications
Populer Posts