

In this blog, we will conduct a comparative analysis of inductors and capacitors, exploring their differences, inner workings, applications, and hi...
View detailsHow to Install RTOS on Raspberry Pi?
In this blog, we'll delve into the fascinating realm of RTOS, explore its functionalities, and guide you through the steps of installing it on your Raspberry Pi.
What is an RTOS?
On the Raspberry Pi, the RTOS is a maestro at multitasking, ensuring that each task is completed on time and with the least amount of latency. A real-time operating system (RTOS) prioritizes real-time tasks above multitasking, which is different from traditional operating systems and ensures predictable reaction times that are essential for applications like industrial automation, robotics, and medical devices.
Components of an RTOS
- The Scheduler: Establishes the sequence in which tasks are completed according to their priority.
- Symmetric Multiprocessing (SMP): Manages several tasks at once for parallel processing.
- Function Library: Serves as a conduit between application code and the kernel.
- Memory Management: Program memory allocation is done by memory management.
- Fast Dispatch Latency: The time lag between the end of a task and the beginning of real processing.
- User-Defined Data Objects and Classes: Computer languages that are organized, such as C or C++, are used to create User-Defined Data Objects and Classes.
Types of RTOS
RTOS comes in various flavors, each tailored to specific needs:
- Microkernel RTOS: Compact and effective, perfect for settings with limited resources.
- Monokernel RTOS: For mission-critical operations, a monokernel real-time operating system (RTOS) provides superior resource control and determinism.
- Hybrid RTOS: High-performance systems frequently use hybrid real-time operating systems (RTOSs), which combine the best aspects of both.
Here is a table that summarizes the different types of RTOS:
| Type of RTOS | Deadlines | Examples |
| Hard real-time | Guaranteed | Medical devices, industrial control systems, avionics |
| Soft real-time | Not guaranteed, but strives to meet them | Multimedia systems, embedded systems, robotics |
| Firm real-time | A mix of hard and soft guarantees | Industrial automation, process control |
How RTOS Works?
Prioritizing real-time work with tight deadlines, RTOS differs from ordinary operating systems in how they schedule tasks. It is ensured that these tasks will be completed even in the presence of other operations by assigning them specific time slots. To guarantee real-time responsiveness, this deterministic method gets rid of jitter and unpredictable delays.
What’s Raspberry Pi?
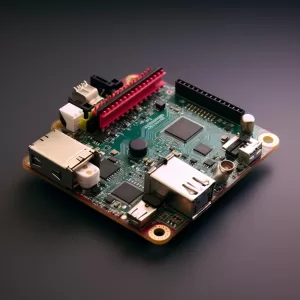
The Raspberry Pi, a credit card-sized computer, changed the way people experimented with and learned about electronics. It's perfect for learning about electronics and computer science, making robots, and programming projects because of its price, modularity, and wide software ecosystem.
How Raspberry Pi Works?
The Raspberry Pi functions as a small computer system with RAM, storage, and a central processing unit (CPU). It is powered by an operating system similar to Linux, which lets you use software and interface with the hardware. By giving real-time tasks priority for accurate and deterministic execution, RTOS provides an additional layer of control.
How to Install RTOS on Raspberry Pi?
Now that you understand the essentials of RTOS and Raspberry Pi, let's dive into the actual installation process.
- Choose your RTOS:
Find and choose an RTOS based on your project's requirements. Popular choices for the Raspberry Pi are ChibiOS/RT, Zephyr, and FreeRTOS. Take into account elements such as community support, resource requirements, performance, and the availability of libraries.
- Download the RTOS image:
Go to the RTOS website of your choice and get the image file that corresponds to your Raspberry Pi model. Make sure the version you download is compatible with the software and architecture of your Pi.
- Prepare your SD card:
Make sure the SD card is compatible with your Raspberry Pi before formatting it with an application like SD Card Formatter. Dedicated tools for flashing the image onto the SD card are available in several RTOS releases.
- Flash the RTOS image:
To write the downloaded RTOS image to your SD card, use the Raspberry Pi Imager, Etcher, or another flashing tool. Pay attention to the detailed instructions that your selected tool provides.
- Boot your Raspberry Pi:
Put the Raspberry Pi's SD card with the RTOS image inside and connect the power supply. If you'd like, connect a keyboard and mouse or an HDMI display (some RTOS implementations operate headless).
- Configure your RTOS:
Configuration tools or command-line options are available in the majority of RTOS distributions to configure network settings, serial port connections, and other important factors. For detailed instructions, see the RTOS documentation.
- Test and verify:
Test applications or simple programs to make sure the RTOS is installed and operating properly. To get you started, a lot of RTOS distributions offer tutorials or sample projects.
- Explore and learn:
Take a closer look at the documentation, online forums, and accessible libraries of your preferred real-time operating system. Try out several real-time programming approaches and use the Raspberry Pi to develop your RTOS-powered creations!
Remember:
- Make a backup of your original SD card: It's imperative to backup your current Raspberry Pi operating system, if it's not already installed, before flashing the RTOS image.
- Pay close attention to the instructions: Every RTOS and flashing tool contains a set of instructions. To prevent installation issues, follow the instructions as given.
- Become a part of the community: Online communities and RTOS forums provide helpful guidance and tools for debugging and education.
Video related to How to Install RTOS on Raspberry Pi
Raspberry Pi Power Requirements
Choose the right power supply for your RTOS project:
- Model-specific requirements: The power requirements of various Raspberry Pi models differ. For suggested power supply, consult the official documentation.
- RTOS considerations: Certain RTOS distributions may need a certain amount of power usage.
Where Raspberry Pi is Used?
Raspberry Pi's versatility shines in diverse applications:
- Education: Using interesting projects, teach robotics, electronics, and coding.
- Home automation: Managing appliances such as thermostats and lighting.
- Media center: Playing games and streaming movies and music at the media center.
- Web server: Providing web and application hosting.
- Prototyping: Developing and testing electronic circuits and software.
Arduino vs Raspberry Pi
Choosing between Arduino and Raspberry Pi depends on your project's needs:
- Arduino: Perfect for low-power projects, robotics development, and basic sensor interaction.
- Raspberry Pi: Perfect for complicated real-time applications, software development, and projects demanding substantial connectivity and computing capability.
Orange Pi vs Raspberry Pi
Both Orange Pi and Raspberry Pi are popular single-board computers, but they cater to different user groups:
- Raspberry Pi: Better suited for hobbyists and educational projects, this device is more beginner-friendly and has a large community and educational materials.
- Orange Pi: Suitable for expert users and developers, this device frequently boasts stronger performance specifications and more RAM at a somewhat higher price point.
How to Control Raspberry Pi Remotely?
Unleash the power of your Raspberry Pi from anywhere with these remote control options:
- SSH (Secure Shell): Use a command-line interface to establish a secure connection from any machine.
- VNC (Virtual Network Computing): Use a graphical interface to remotely view the Pi's desktop.
- Web-based tools: For easy control, use the web interfaces that certain RTOS distributions offer.
Choose the right display for your RTOS project
- HDMI monitor: Standard HDMI screens are compatible with the majority of Raspberry Pi devices.
- Touchscreen displays: Dedicated touchscreen displays are advantageous for interactive projects.
- Headless operation: Some RTOS projects rely on network access or remote control to operate without a display.
How to Reset Raspberry Pi?
Soft reset or hard reset your Pi depending on the situation:
- Soft reset (reboot): Use the "sudo reboot" command from the command line or via the RTOS interface to do a soft reset (reboot).
- Hard reset: Press and hold the power button to force the Raspberry Pi to turn off, then turn it back on.
Conclusion
With Raspberry Pi, installing RTOS opens up a world of real-time possibilities. By following these instructions and making use of this little powerhouse, you may push the limits of your technical and creative abilities by creating projects that are responsive and precisely timed. So go ahead and start your RTOS adventure, utilize your Raspberry Pi's real-time capabilities, and bring your creative concepts to life!
Ella
Ella is a skilled embedded systems engineer with experience in PCB design and microcontroller programming. She is committed to following the most recent developments in the field and is constantly seeking for ways to apply them to her work.
WEW ALL POSTS BYEllaRelated Articles
-
 Inductors vs Capacitors: A Comparative Analysis of Energy Storage 395
 -
 Taking a Closer Look at Resistors: Functions and Applications 258
Basic electronic components known as resistors are essential for regulating the flow of electric current in circuits. They are widely used in conte...
View details -
 Unveiling Amplifiers in Power Electronics 248
In this blog, we will delve into the world of amplifiers, exploring their functionality, common issues, testing methods, and practical usage.
View details -
 Exploring 3D IC Technology: Unleashing the Power of Vertically Stacked Innovation 253
The blog delves into the concept of vertically stacked integrated circuits, where multiple layers of circuits are interconnected, leading to numero...
View details -
 SR626SW Battery Demystified: What You Really Need to Know 44
In this blog, we will delve into the world of the SR626SW battery, demystifying its specifications, exploring its applications, and providing valua...
View details -
 How DRAM Works? 328
In this blog, we will uncover the benefits that make DRAM the top choice for quick and effective data storage, while also acknowledging its limitat...
View details